PowerPC Mac Emulation
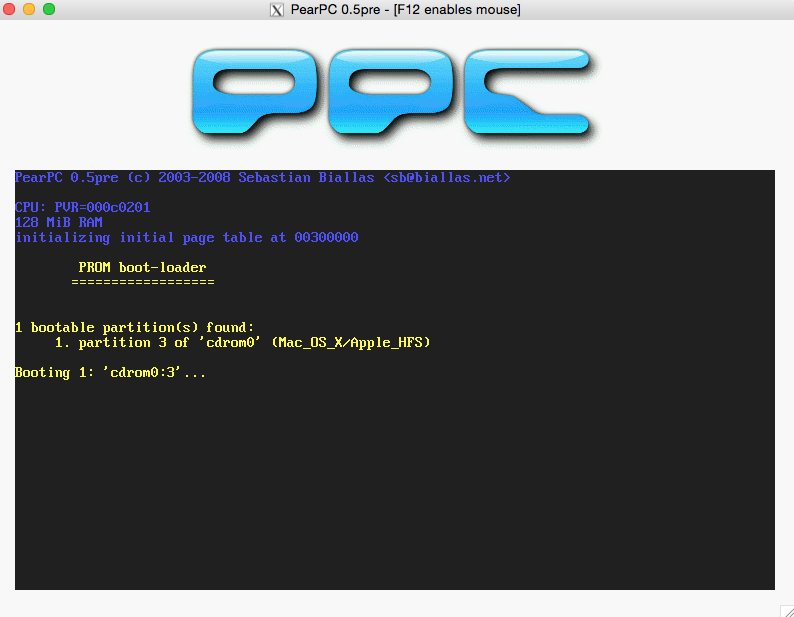
A couple weeks ago Mona Jimenez asked me to step into her course on Handling Complex Media, to help a student group with a tech request (business as usual). Going back to the lab, I had a hint of what was coming from the whiteboard:
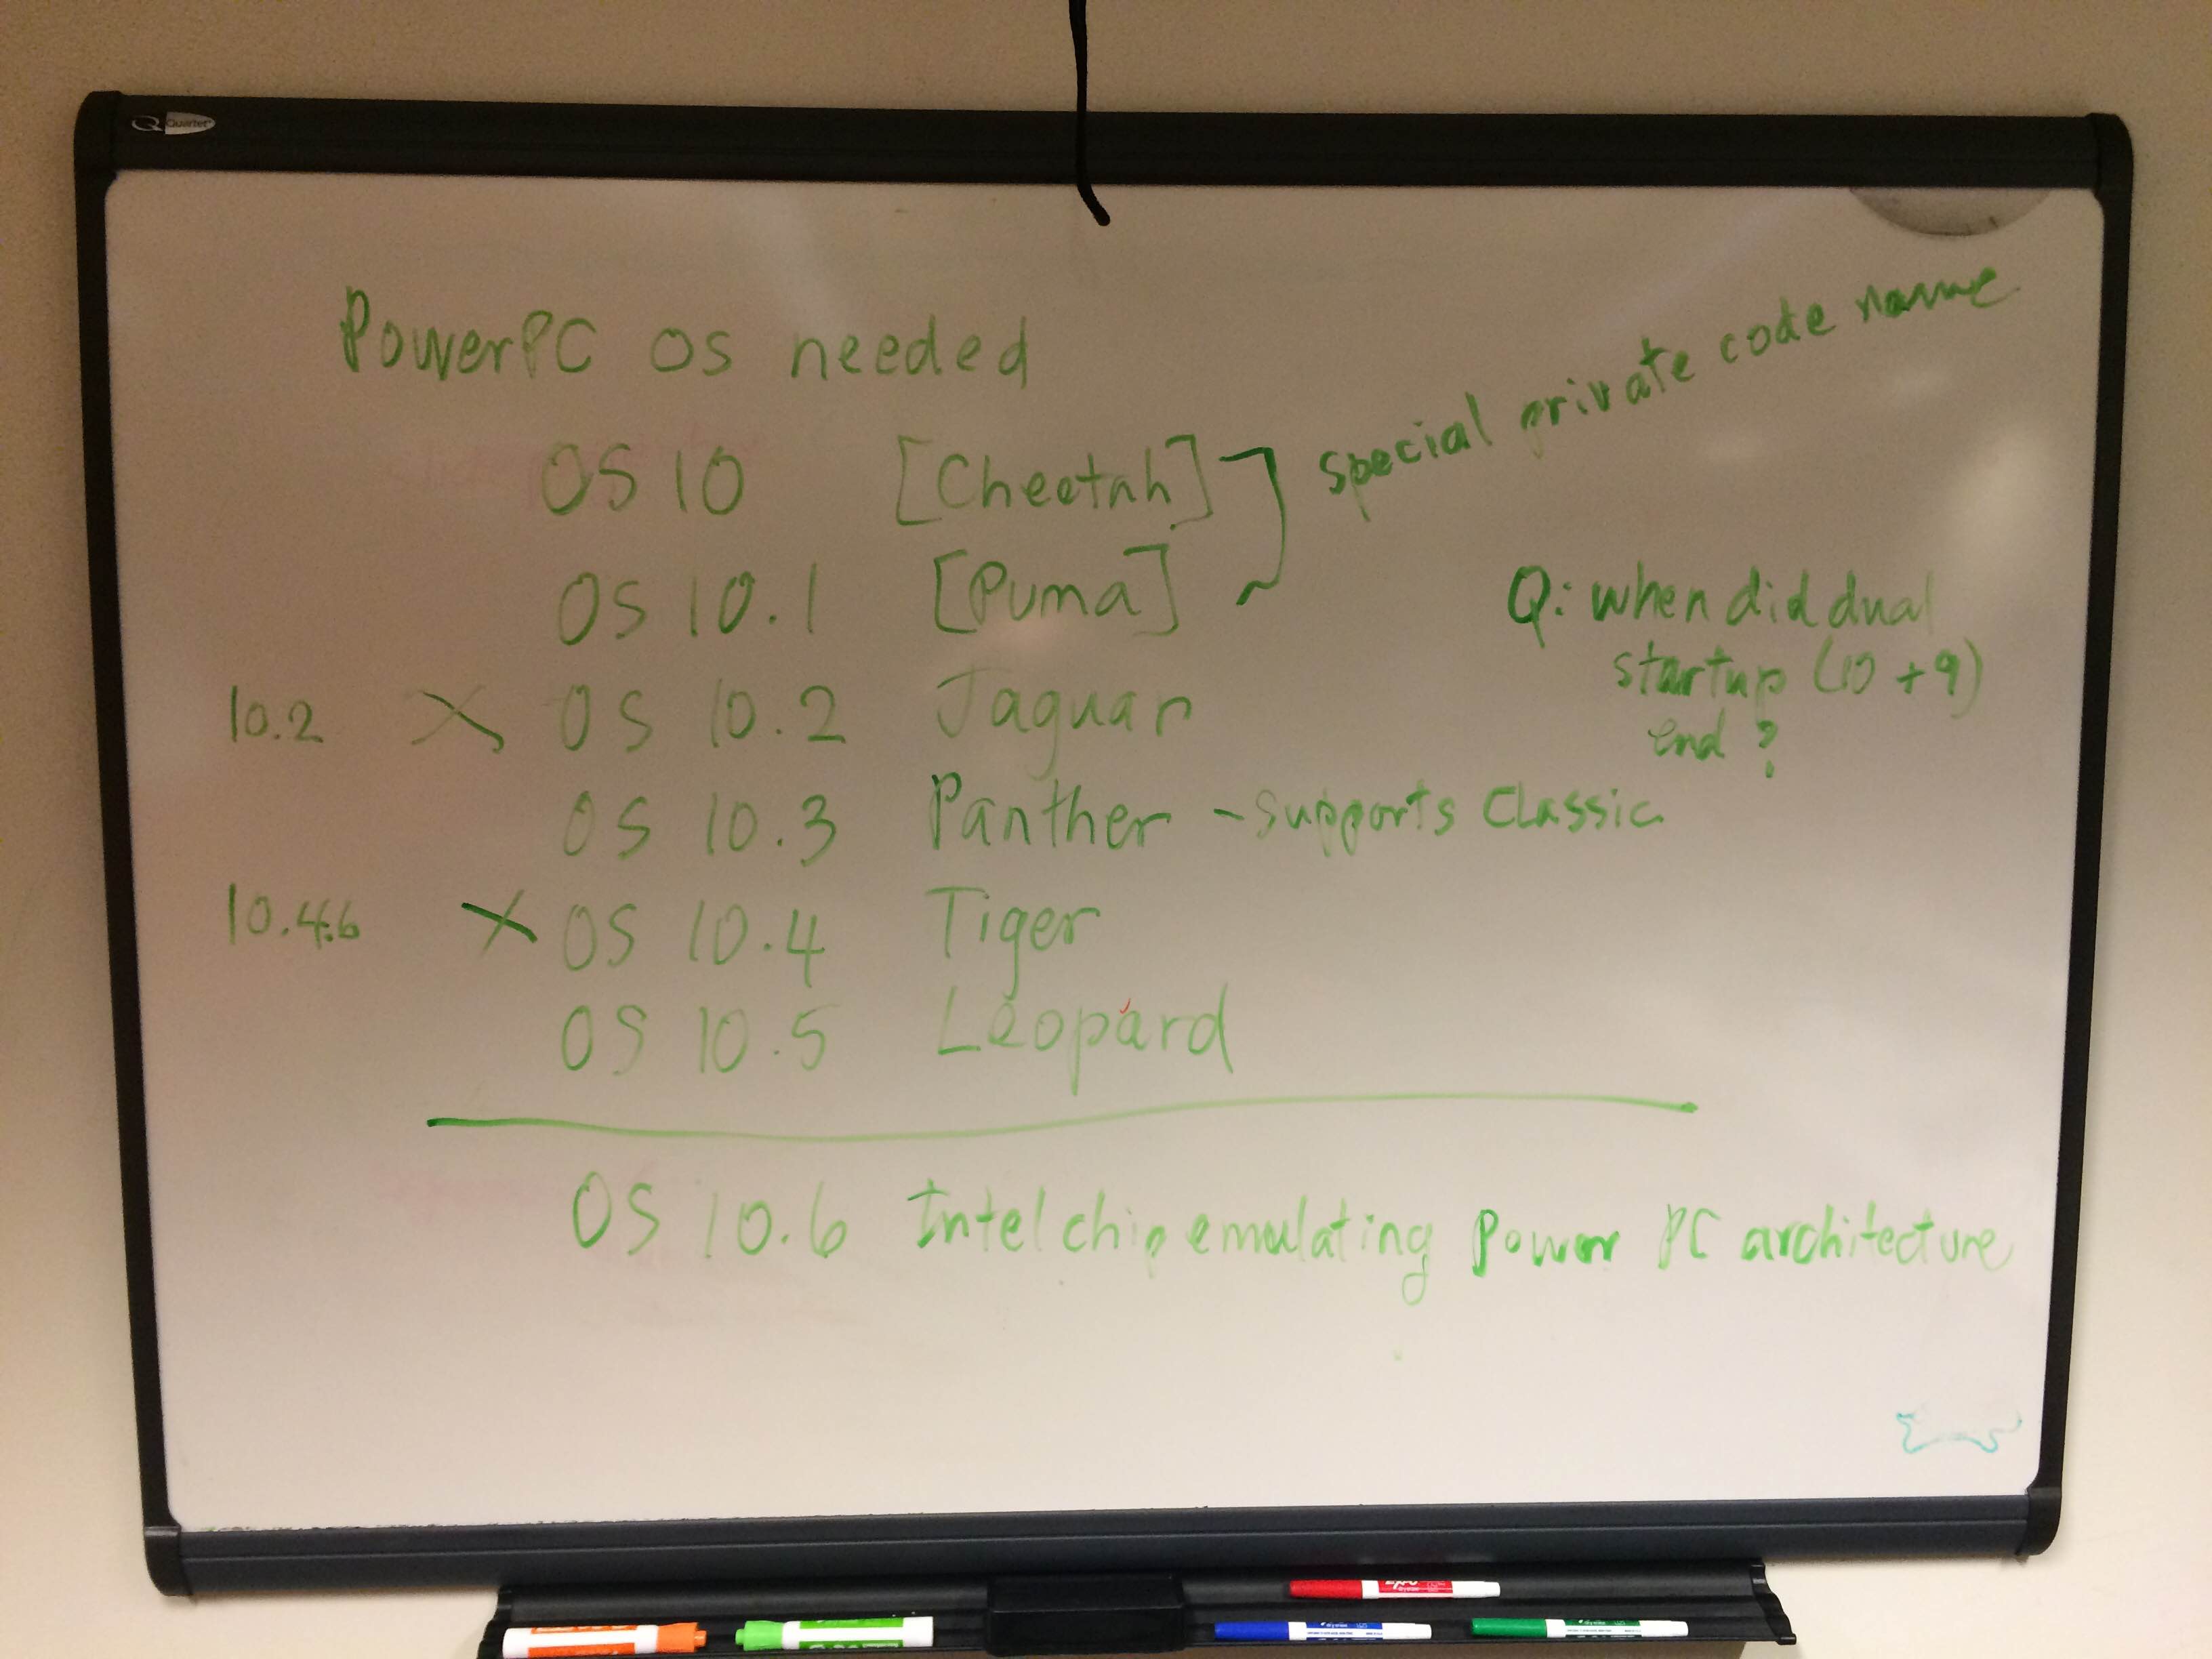
Yes, as it turned out, the students were working with a piece of multimedia artwork/software that required a PowerPC version of Mac OSX (10.0 through 10.5) in order to run. Normally, this wouldn't present much of an issue, as MIAP's "Old Media Lab" still has several old Power Mac G4 desktops and even a couple Macbook laptops running various early versions of Mac OSX. However, the students would only have access to the digital materials on-site at the partner institution for this project, and could not bring the software back to NYU. They could (and might still, if it comes to it) just bring the laptops to the site and run the software in the native environment, but that's unideal for a couple reasons: first, I'm always somewhat hesitant for department equipment to leave campus; and second, having old hardware running these old operating systems natively is something of a luxury, which our students may very well not have in the future as equipment continues to age, or if they work at an institution with shallower pockets for digital preservation.
In order to access software or digital files created for obsolete systems, the primary solutions these days are emulation and virtualization - two slightly different methods of, essentially, using software to trick a contemporary computer into mimicking the behavior and limitations of other hardware and/or operating systems. Emulation has gotten incredibly sophisticated recently - the Internet Archive has even made it possible to run thousands of vintage MS-DOS and Windows 3.1 programs from an emulator inside your web browser, no additional downloads required, which is really an incredible feat of programming. Emulators for early Mac systems (anywhere from 1.0 to 9.x) are relatively simple to set up in OSX 10.10 (Yosemite) or 10.11 (El Capitan), likewise virtual machine software like VirtualBox (all topics for another day).
But right now the early, PowerPC versions of OSX seem to be something of an emulation/virtualization dead zone. I'm not the person to ask why - I'm assuming that the shift from PowerPC to Intel processors (starting with OSX 10.6, Snow Leopard), shifted the system architecture dramatically while the operating system remained relatively the same, resulting in a particular hardware/software configuration that just confuses the heck out of current setups, even through an emulator. It's clearly possible - sift through the forums of Emaculation or other emulation enthusiast sites and you'll find five-year-old boasts of people getting OSX Puma to run in Windows XP, or whatever - but documentation is sketchy and scattered even by internet standards, and replication therefore a crapshoot.
So, how do I help these students get a PowerPC version of OSX on one of their (Intel Mac) laptops? Anytime we need new Mac software in the department, I try it out first on my office computer, a mid-2011 iMac running OSX 10.10.5.
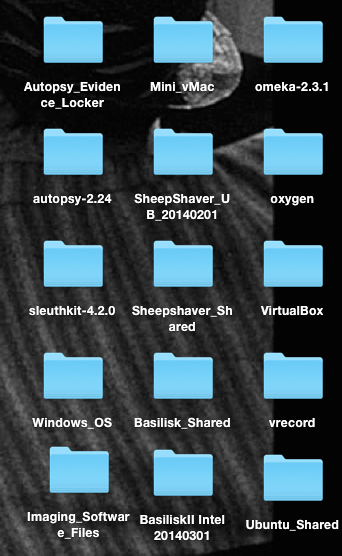
I eliminate using VirtualBox almost right off the bat - the makers of VirtualBox explicitly state that the software does not support PowerPC architecture, which, again, doesn't mean it's impossible, but it does mean that unless I magically have the same computer setup as a random YouTube user, I'm completely on my own. Instead I'm going to use PearPC, an old PowerPC architecture emulator (it hasn't been updated since 2011), but one with some solid documentation to get started. I'll be trying to install OSX Tiger (10.4) in PearPC, as we still have a couple original installation discs for Tiger still lying around the department, and Apple install discs are otherwise hard to come by (if you don't like going to/supporting super dubious torrent sites, or buying overly expensive copies off Amazon).
PearPC recommends installing Darwin as your client OS (the OS running inside the emulation software) first, to properly partition and format your virtual hard disk (the fake hard drive the emulator will use to make the OS think it's being installed directly on to a piece of hardware). But I immediately just ignored that because WHAT THE HELL IS DARWIN?! So, I skip to just downloading the PearPC 0.5 source archive for Unix (e.g. Mac) systems.
Uh oh. A source archive means the software needs to be compiled before it will actually run. Normally I would immediately turn away and go find someone who had already compiled a packaged OSX build FOR me, but the PearPC documentation includes some seemingly straightforward command-line instructions for this step. So, I open a Terminal window, navigate into the PearPC-0.5 directory, and attempt a default configuration and make with
$ ./configure && make
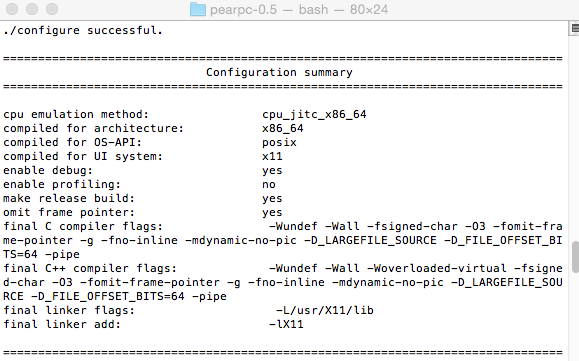
Lots of Terminal gobbledygook aaaaand PearPC seems to automatically detect my system configuration fine:
But then in the make....
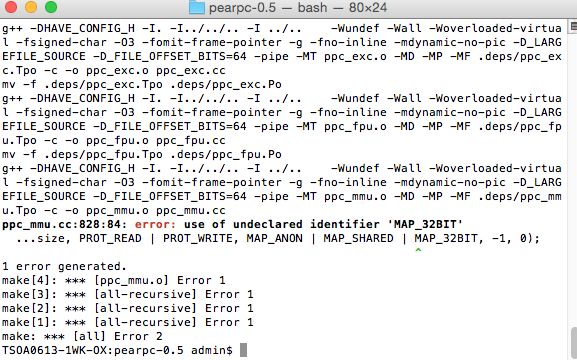
Oops. I have no idea what this 'MAP_32BIT' identifier is, nor how to change it, nor if that's really even the issue here. So ends my efforts to self-compile - pretty please, tell me someone has already done this for me?

Huzzah! Google directs me to this very nice Dutch expert (who is also apparently secretly a cat on his 7th life) in the Emaculation forums has already compiled an Intel Mac OSX build of PearPC. YOINK.
Per the Dutch Cat, I still need a configuration file and a blank hard disk image. So it turns out to be good that I downloaded that Unix source archive, even if the compiling didn't work, because I can just steal the "ppccfg.example" configuration file from that directory and move it into my OSX build directory. It's just a simple text file, so I can rename it whatever I want for clarity's sake.

Now I need the blank hard disk image. Back in the PearPC documentation, we've got some handy details on the specs needed (a multiple of 3GiB size, in particular), and how about that, a sample dd command to make one. When I did this I just used 3GiB, but I'd recommend the 6GiB size, just to make sure you have room for the installation of OSX Tiger and something leftover:
$ dd if=/dev/zero of=~/Desktop/pearpc_osx_generic/PearPCTiger.img bs=516096 seek=6241 count=0
My OSX build directory now looks something like this in a Finder window:
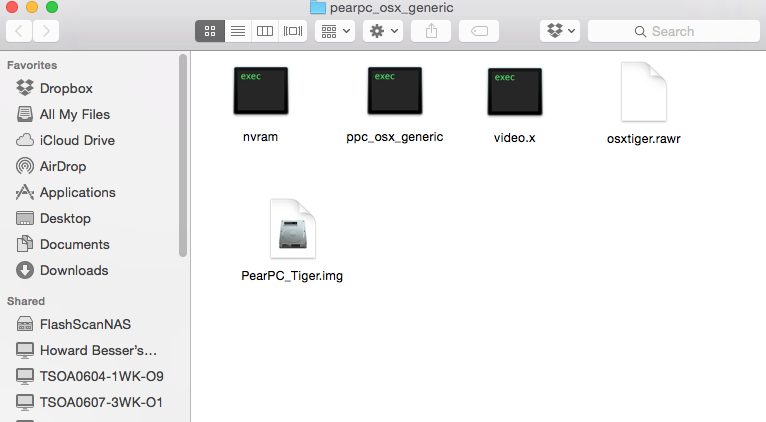
Dandy. Now I just need to set up the configuration file, so the PearPC application is directed to the blank hard disk image and the OSX Tiger install disc (currently sitting unmounted in my iMac's optical drive) when it tries to boot up. So I open the configuration file with a simple text editor (TextEdit, Xcode, even Word will do) and find and change the comment lines that correspond to the hard disk image and install disc paths (you can find path to your mount point for an optical drive by running the command "$ diskutil list" in a Terminal window, then running "$ umount /path/to/disc/drive/" to make sure your host computer unmounts the disc - in most cases, if your desktop/laptop just has a hard drive with one partition and one optical drive, the path will be /dev/disk1)
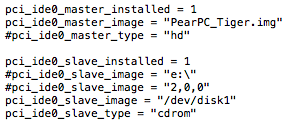
Save the configuration file and we're ready to go, right? Back to Terminal, because PearPC is a command-line application, navigate into the OSX build directory, and run the executable file in the build with
$ ./ppc_osx_generic "osxtiger.rawr"
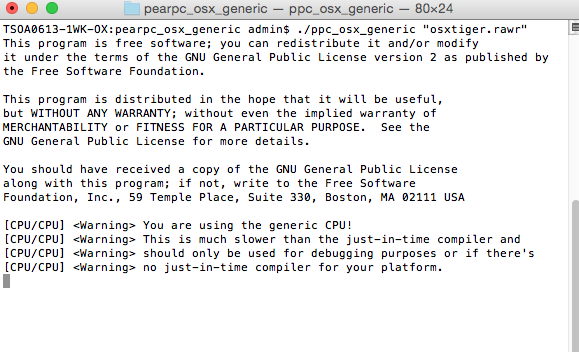
Aaaaand nothing happens. I'm just sitting on the cursor. Why? Tell me, Dutch Cat Man!

As it turns out, the X in "OSX" doesn't just mean "10." It also refers to the X Windows System, a development framework for making applications with graphical user interface windows on Unix systems. It's a standard component in OSX (indeed, in pretty much all Mac OSs over the years), but you need to download some extra software to allow cross-platform software like PearPC to run on it. This software!

All right, XQuartz is now installed, and since I forgot to terminate PearPC and it's been running this whole time in the background, suddenly XQuartz opens, PearPC starts running and booting from the OSX Tiger install disc.

I get the classic gray apple screen, then after a moment, some terrifying-looking text appears. Then...it just sits there. For too long.
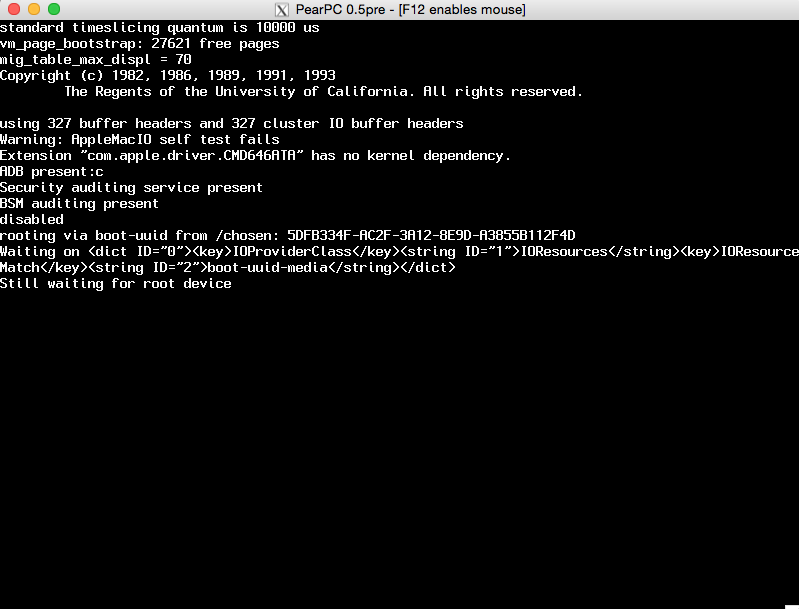
That can't be good. Perhaps I'm getting too fancy trying to boot off the physical disc in my host computer's optical drive - what if I make an image of that instead, and plug it into the PearPC configuration file? There are many options for making disk images, and that's a whole other topic. I'm going to run the absolute simplest of my command-line options right now and see how that goes:
$ cp /dev/disk1 ~/Desktop/pearpc_osx_generic/Mac_OSX_Tiger_Install_DVD.iso
Once that's finished running, I go back into the configuration file and edit the line that corresponds to the install disk image:
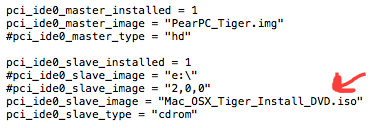
What happens if I run the PearPC executable again now? I've booted back to the scary text screen again, but...
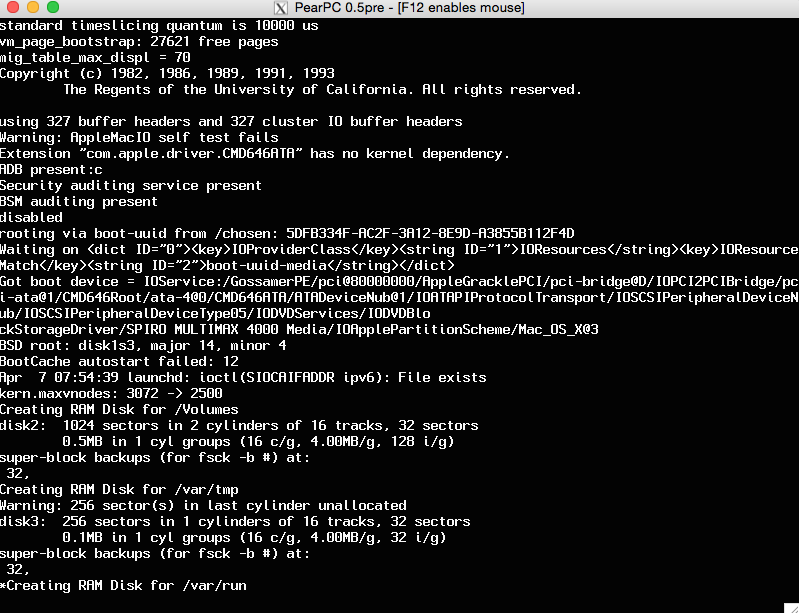
This time it keeps running! I let things scroll for a minute and eventually am greeted by a very familiar sight....
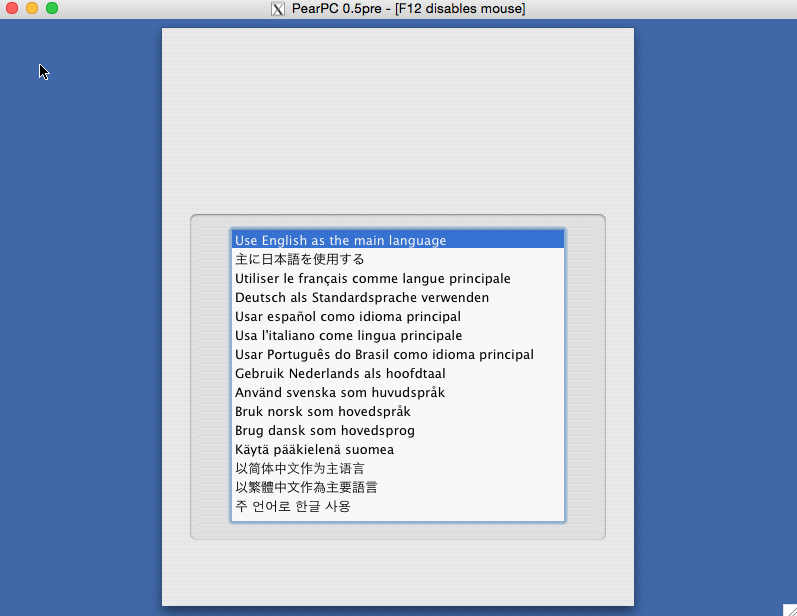
A Mac Installer wizard! We did it everybody!

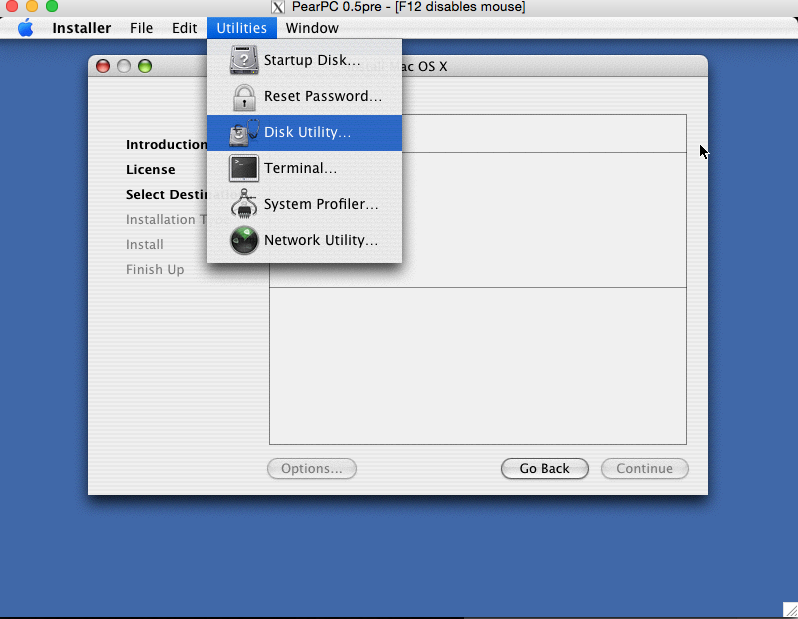
Well, not quite yet. I start to move through the Installer but we haven't actually formatted that blank hard disk image to make it capable of having Mac OSX installed on it yet. So, when stuck at the "Select Destination" screen with no options for where to install the OS, I'm going to head into the "Utilities" tab and enter Mac's Disk Utility software.
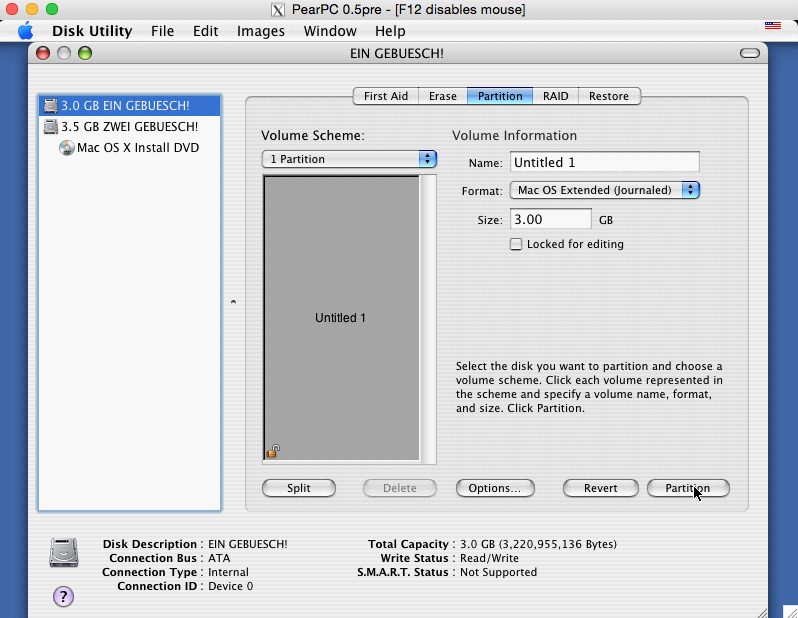
In order to format my blank hard disk image, I'm going to select the image from the left-hand menu, navigate to the "Partition" tab, then select "1 Partition" in the Volume Scheme and "Mac OS Extended (Journaled)" as the Format, and click Partition in the lower-right to execute.
Once that's finished, I'm able to exit Disk Utility and return to the Installer - and the formatted hard disk image is now available to select as an installation destination. Now, OSX Tiger needs about 4.8GB of space to install in its entirety, which is why I told you to make a 6GiB image earlier. If you've made a smaller, 3GiB image as I did, you'll have to de-select some of the installation packages. It's not that big a deal - a ton of space is taken up by non-essential features like device drivers and extra languages.
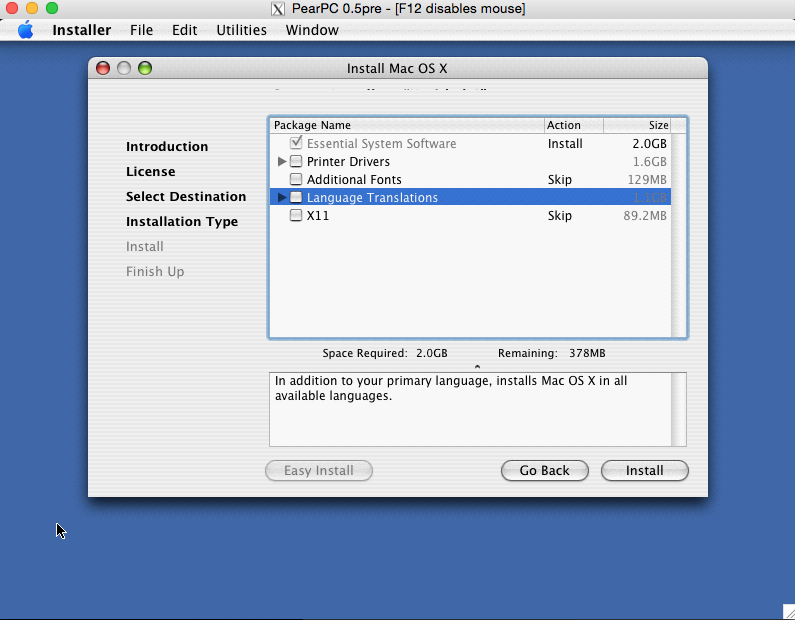
OSX Tiger is now ready to install. Now, if you're following along, you may have noticed at this point that PearPC runs slooooooooooooooooooooooooooooooooooooooooooooooooooooooooooooooooooooooooooooooooooooooooooooooooooooooooooow

So yeah, this installation takes a while. Like possibly hours, plural. I went off to do some other work and forgot to tell my host computer not to go to sleep, which made PearPC just pause the installation for about an extra hour. Don't do that.
OSX Tiger did successfully install, however, but here's the kicker - as I went through the initial setup, it turns out that PearPC did something COMPLETELY WONKY to the mapping on my keyboard during that installation. So, when trying to set up a user account and just typing like a normal person, I got this nonsense:
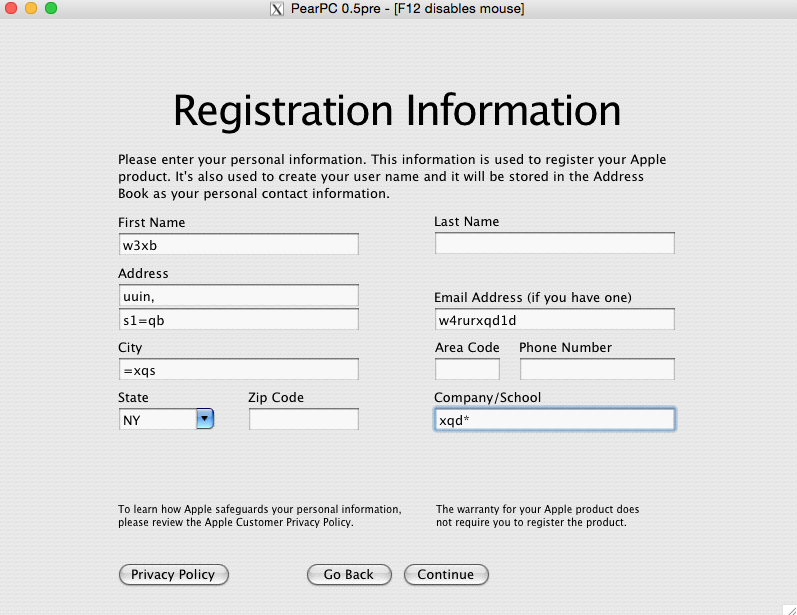
I wish I could tell you that I solved this problem, but no, I just had to painstakingly poke at one button at a time until I figured out that now while in PearPC, e=delete, 4=n, v=9, so on and so forth. When I finally got into the OSX Tiger desktop and was able to go to System Preferences, I thought I had fixed it by switching to a Canadian keyboard layout (why do you even have a separate keyboard layout, Canada?), but now every time I boot back into PearPC it resets. So that's a mystery and if anyone has ideas how to fix this I'm all ears.
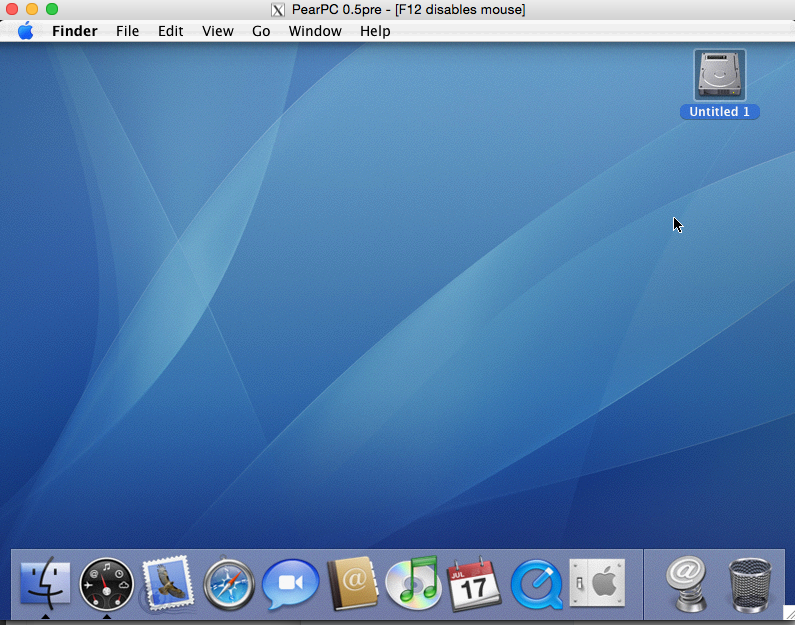
But, for the moment I'm calling this mission accomplished. Again, OSX Tiger in PearPC runs AS SLOW AS DIRT, so this is not ideal, and I would still like to figure out how to crack the VirtualBox solution for all this. But from what I can tell that might involve this mysterious Darwin operating system that apparently makes all my Apple computers work...and given how this post has already turned out much longer than I intended, that's a topic for another day.

If you've had any success setting up a PowerPC Mac OS in an emulator or VM, I'd love to hear about it!